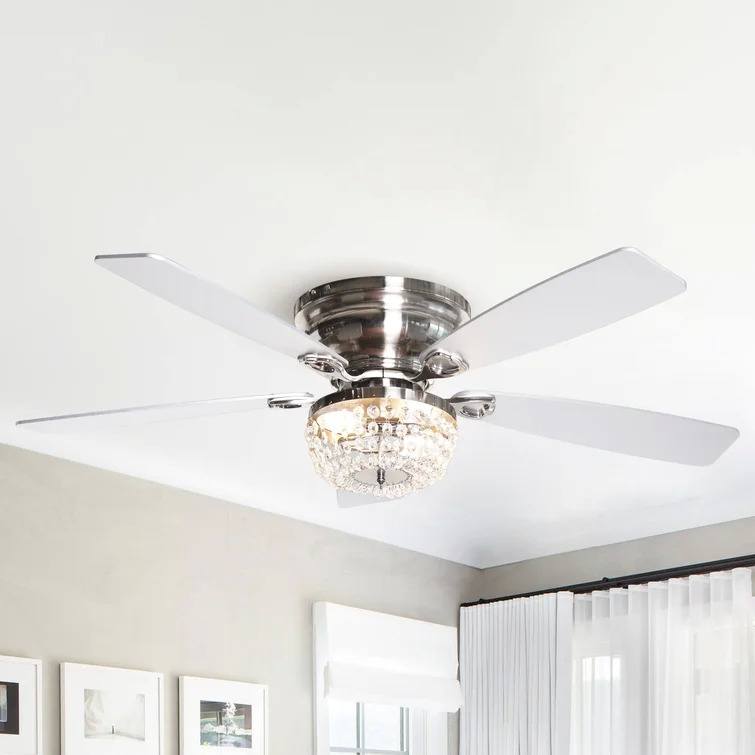
You and your family need a ceiling fan, it is a great product to help cool and circulate air. Therefore, you must pay close attention during the installation of the ceiling fan. The machine will run quieter and quieter if the ceiling fan is installed correctly, rather than creating noise due to mechanical problems. In addition, if the fan operates at high speed, it will be very flexible and easy to fall when used. The safety of family members will be protected by properly installing the fan. You can trust that when in use, the fan will not fall over. In addition, the lifespan of a ceiling fan can be shortened due to poor installation. Therefore, if you do not know how to install a ceiling fan, follow our process on how to install a flush mount ceiling fan.
How to install ceiling fans safely and properly
Before beginning to install a ceiling fan, you should carefully read the manufacturer's installation instructions because each type of fan will require a different installation technique. In addition, the ceiling fan is extremely heavy, so you must install it high while paying close attention to your surroundings and ensuring your safety.
You can refer to the following steps to install a ceiling fan:
Step 1: Attach the fan bracket
In order to prepare the ant's head and provide space for the fan, the homeowner actively calculated with the ant designer when the house was being built. The owner may choose to set the frame & hangers floating or sinking, but they must be strong enough to withstand the overall force of the fan. The ceiling will not be affected.
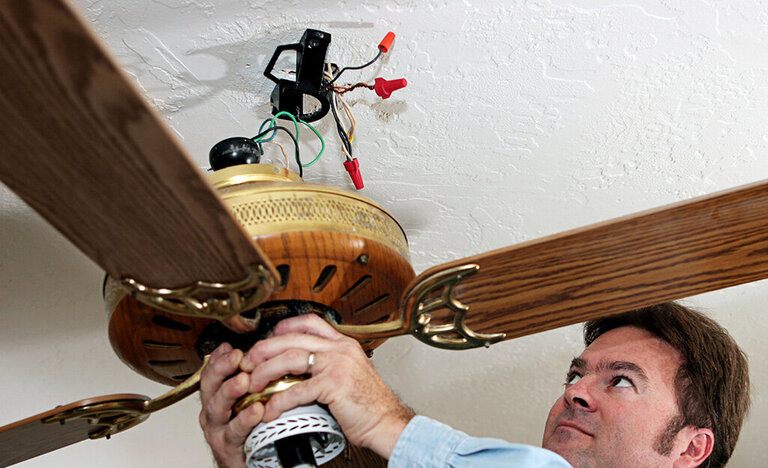
Step 2: Attach the hanging bracket to the electrical box.
Screws and washers should then be used to secure the fastener to the electrical box. To be safe, turn off the electricity using a power detector to make sure it's fully off.
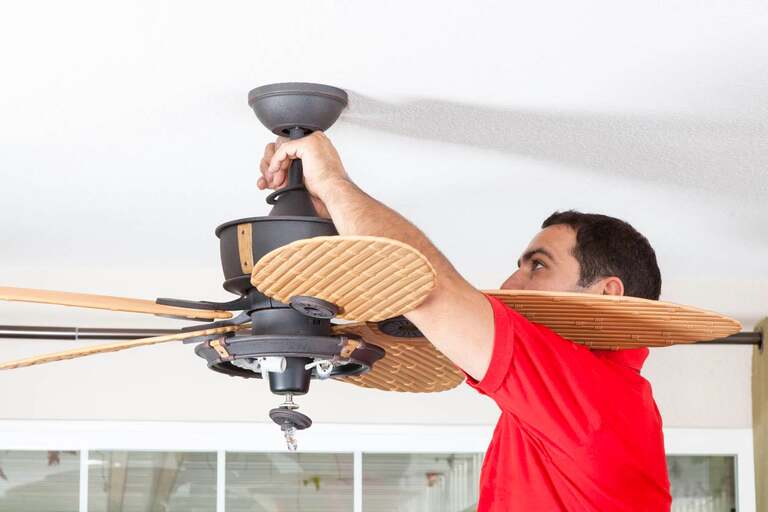
Step 3: Installation for the ceiling fan.
On the fan motor, attach the fan blade. To fix the propellers, you must first remove the screws from the motors, install the propeller, and then tighten it with a screwdriver. Be careful not to let the propeller's safety pins shoot out. Install the proper anti-falling step and safety pins before installing the propellers.
Step 4: Connect to the power cord.
It is very simple to attach a ceiling fan. Hot wire (red), cold wire (blue), and cool wire are the standard number of wires for fans (green or white). Pay close attention to how the hot and cold wires are connected, if your home's power supply does have a cool wire, attach it, if not, it will remain unconnected.
Step 5: Hang the fan.
The ceiling fan must be hung in the final phase, which likewise requires extreme caution. Pay close attention when installing it yourself because the fan is heavy. Furthermore, seatbelts must be tightly fastened.
Test the fan from low to medium speed after hanging it to ensure that it is mounted securely and that the power supply is working properly. Make that the fan is stable both while it is functioning and when it is not.
Notes on how to match a ceiling fan
Location for ceiling fan installation
To provide cooling and even air movement throughout the space, ceiling fans are usually placed in the center. However, a small space cannot accommodate the installation of a large ceiling fan. Or do not place a ceiling fan in a space that is at least 100 square meters. Decide whether the number of fans or the acceptable blade spacing is sufficient based on the size of the room.
- Fan with a 76 cm wingspan is appropriate for spaces of 2.4 x 3 meters (small rooms, individual rooms).
- Fan with a 106-centimeter wingspan is appropriate for spaces of 3.6 x 3.6 meters (medium room, basement area).
- 5.4 x 6 meter spaces should need a fan with a 132 centimeter wingspan (big room, living room...).
When installing a ceiling fan, keep in mind that it needs to be set back from the wall by at least 0.8 meters in order to avoid hitting the wall and allow for proper air circulation. Additionally, if you plan to install many ceiling fans within the same space, you should make a reasonable calculation for the spacing between the fans. To maintain the room's coolness, there should be at least 3 meters between the fan centers.
Distance between floor and ceiling fan
When installing a ceiling fan, one of the crucial details to pay close attention to is the safe distance between the fan blade and the floor. This will prevent the fan from touching persons or items that are standing just on the floor. The maximum acceptable distance between the propeller and the floor ought to be between 2.5 and 2.7 meters, and it shouldn't be more than 4 meters.
- Installation as usual, hangers not required for low ceilings.
- Standard installation and hangers are available for ceilings with a 2.5 m standard height.
- Heighten hanger length for ceilings exceeding 2.7 meters.

Safety factor
When choosing a ceiling fan, safety is a crucial consideration. The following are some things to remember:
- Check to see that the fan's attachment to the ceiling is secure. Avoid having the fan tumble or make noise while it is running.
- It should be fitted in accordance with the manufacturer's guidelines and requirements. Verify that the fan can run easily and without any issues.
- Regarding the electrical system: To prevent overloading or the use of additional power-loading devices, big capacity fans must receive power directly from the main electrical panel. For the fan line, you need to construct a standby power line. To create a design that is both safe and aesthetically beautiful, you should also speak with a qualified electrician.
- If you need to hang a fan during the architectural design of your home, you may easily install a ceiling fan using fan hooks. However, it is required to produce imitation hangers using screws or hooks for rooms lacking hangers. Some more recent ceiling fans will include a hanger from the manufacturer. You should appoint a qualified expert to carry out this portion in order to guarantee safety while using. Never haphazardly fasten non-standard hooks or screws.
Additionally, after setting up and using the fan, you should be careful to regularly check the ceiling fan's condition. Seat belts still are securely fastened, however screws have to be tightened. Additionally, be sure to clean the fan on a regular basis using a soft cloth, being careful not to shake or bend the blades.
Ceiling fan maintenance time
You should service the ceiling fan after using it for three to four months to keep it operating effectively and preserving its longevity. It is important to inspect whether any machine or electrical parts have rusted or corroded.
You should service the ceiling fan after using it for three to four months to keep it operating effectively and preserving its longevity. It is important to inspect whether any machine or electrical parts have rusted or corroded.
Steps to properly maintain a ceiling fan:
- Cleaning lights and propellers
- Check screws.
- For lubricating oil
Conclusion
The way a fan is mounted has an impact on both how it looks and how well it works. Downrods are the favored way of hanging ceiling fans due to their numerous applications and enhanced air circulation, even if flush mount installation provides advantages. Several considerations determine if a fan can be changed from a flush mount to a downrod installation. Everything you need to know about changing a flush mount ceiling fan to something like a downrod install is covered in this article. Although installing a ceiling fan is a very simple operation, there are certain risks involved. Therefore, you must seek the assistance of trained personnel if you lack the necessary knowledge and experience to ensure safety. We hope this article will bring you a lot of useful information.


