When you are a beginner crimping an RJ-45 connector to a cable may seem like rocket science though it's not at all. An RJ-45 can be crimped without even using a crimping tool; however, having a crimping tool will make it a bit easier.
Use the crimping tool to remove a part of the sheath, then disentangle and set the wires accordingly. Now, you need to fit those wires into the designated Connector and apply and utilize that cramping part of the tool compresses the little pins into the cable. Remember to make sure you have secured the Connector properly.
Sometimes you may not have a crimping tool in that case, don't worry! a knife or scissors can be useful to you here. We will discuss further in the details below. So, in our today's article, you will learn how to wire and crimp RJ45 Connector.
How To Wire And Crimp RJ45 Connector
In this section, you will learn how to wire and crimp RJ45 Connector when you have a crimping tool
Step 1
First of all, from the back section, you need to stripe the targeted cable near about 25 mm back. Put the cable in-between the two strippers and squash it tightly. To get a clean-cut, you got to revolve the crimping tool around your cable but make sure of an even motion.
Now, keep your tool fastened and recede towards the ending point of the wire in order to pull out the sheathing. You will find the stripping section close to the handle of your tool; it's basically a round hole. The wires must be visible fully after taking off the sheathing.

Step 2
This time you need to straighten and disentangle the cable's wires. When looking inside of the cable, you will see a couple of smaller wires entangled together. Your duty is to separate and straighten those wires so that you will be able to arrange them in an orderly fashion.
We suggest you to off those little plastic wire separators, so it stays away from the designated way. Make sure you don't end up cutting off any of those wires; otherwise, you won't be able to crimp them.
Step 3
Now it's time to arrange the wires accordingly. You may take the help of your fingers to place the wires in an orderly manner so that the crimping process can be done properly. Keep in mind that a sequence that goes from left to right is a proper sequence. You will have to put in a total of 8 wires into the correct sequence.
Step 4
You have to maintain an even line of around 13 mm when cutting the wires from the sheathing. To keep the wires orderly hold, them by using your index finger and thumb. Then cut the wires in an even line using the crimping tool.
The wire cutters will be featured by the cutting section of your tool. And remember that the wires must be aligned properly in order to crimp into the RJ-45 Connector accordingly.
Step 5
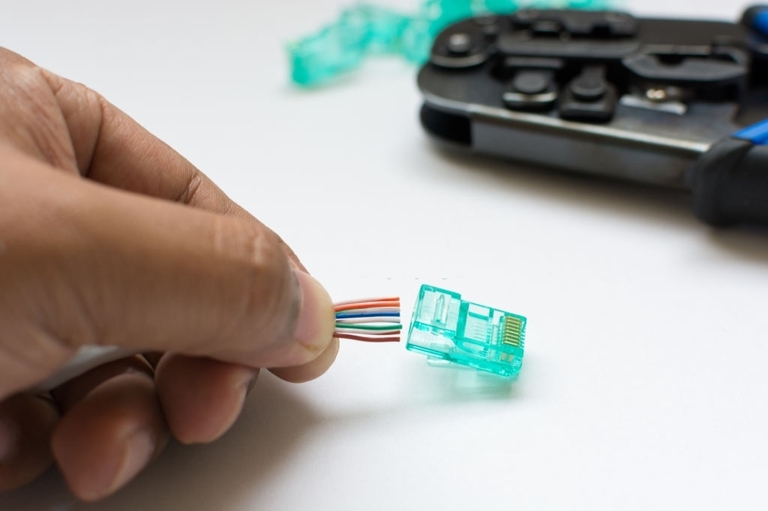
This time you got to insert the wire into the RJ-45 Connector. When holding the RJ-45 Connector, make sure that the clip is positioned on the base those little metal pins are pointing upwards. Now, it's time to join the cable into the Connector. When performing this operation, ensure each of those little wires fits perfectly into the little grooves.
In some cases, you may notice that the small wires aren't fitting in the groove rightly. In such a scenario, you have to pull off the cable then straighten the wires by using your fingers before you try next time.
Step 6
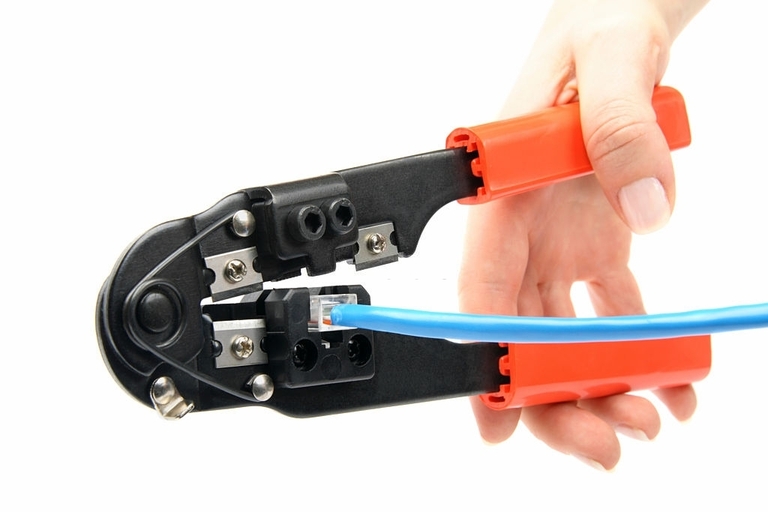
In this step, we are going to insert the connector into the crimping slot and make sure it has been attached properly. You need to squash its handles in order to crimp the connector and make the wires secured. Let go of the handle and squash the tool once more time just to ensure all the pins have fitted correctly.
Step 7
Now you can get rid of the cable from the tool and make sure the pins are down. Detach the Connector away from the tool and have a look at the pins to ensure they are at their correct position. Tug the connector softly to secure the attachment of the Connector to the cable, and you are done.
Final Words:
Setting up cables into an RJ45 can be a bit tricky as you know each of the wires inside of the cable has its individual role. So, it's easy to mess up those when you don't know their functions and to attach the process properly. You will see such connections in ethernet cables.
We hope after reading our today's article; now you know how to wire and crimp RJ45 Connector. Make sure you are going through the steps again and again so that you make no mistakes in any way.


