Lid support hinges are a fabulous solution to stop cabinet & toy box lid slamming issues. And that is why often parents decide to go for it and install it within their kid’s toy box that definitely needs extra safety.
Lid hinges come in so many different sizes and shapes, not to mention the variety of benefits as well as drawbacks. So, even making a choice of those lid support hinges would be a severely serious matter you must pay extra attention to. And if you’ve already completed that task, you’ll try finding out how to install lid support hinge next. That’s exactly what I’ll be talking about today.
I’ll discuss a method that uses a very useful hinge combination. And then we’ll move into breaking down soft close lid support hinges, a very popular solution for the whole toybox safety concern. Let’s get into it.
Select the lid support hinge combination
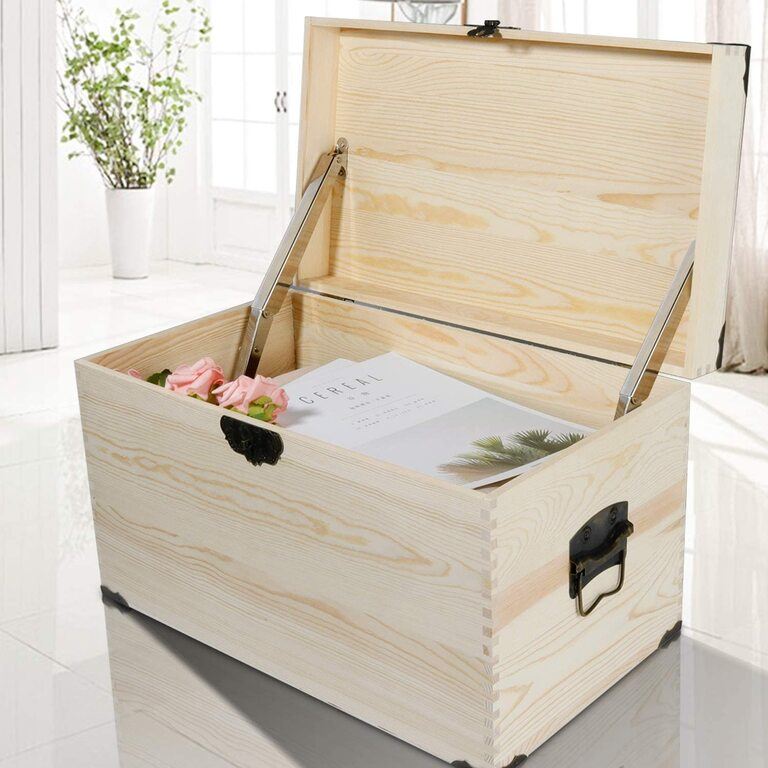
When making a choice of hinge combinations, you must consider the lid’s required support. A wonderfully safe combination could be piano and pneumatic hinges together.
With a piano hinge, you get the traditional stability factor that holds heavy lids with additional support. While pneumatic hinges have more benefits including the freely stopping ability at 70 to 160 degrees positions. Also, it’s very powerful and easy to utilize for toy box lids.
Installing this combination.
You’ll need a tape measure to find out the chest top length. Also, you must determine whether the hinge needs to fit inside or outside of your toy box.
I feel like, keeping the hinges inside will provide a cleaner look. And fortunately, that’s the thought most of the parents have for their kid’s toy box. As the hinge won’t be visible once the lid is closed. So, let’s consider it to be the better choice.
Once you are done taking the measurement for length, move onto the rear edge bottom of lid. Put the piano hinge right here. So, basically, when the lid is down, hinge would be inside your toy box with such placement. Use a pencil and mark that location. This is where you’ll make a mounting hole.
Use a drill to create a tiny hole. The screws should fit inside, chose the bit accordingly before drilling. Make sure the bit is a tad bit smaller in diameter of the mounting screws to keep things going well.
Also, avoid making deep holes. The screws just need to start screwing inside the wood. And there should be no splitting. Those two things are what you must ensure with the hole, and we’re good to move ahead.
For this next phase, you will need a screwdriver (ideally a Philips's head) to basically fix the piano hinge into tool box’s lid. The lid will be in opening positioning of course before you start. If it’s a huge box, get some help.
Ask your spouse or maybe a friend to hold the lid for you. And then, carefully make some more marks for mounting holes but this time on the rear wall’s top edge part.
Again, you want to keep in mind the bit choice thing based on mounting screws diameter and drill those tiny holes. And then simply attach the piano hinges. Move onto the toy box’s interior rear wall.
You need to fix a pneumatic hinge here. Use screws that should be provided with the hinge to attach those. Also, make sure your placement for the hinge is around 4 inches away from each side. Hold the toy box lid this time in a slight closing position (not entirely) and then attach a pneumatic hinge.
Finally, your hinges are on spot and you can test the toy box lid by opening and closing it a few times. If there are no issues, you are done!
Finally, About How to Install Soft Close Lid Support Hinges.
Getting a soft close lid stay hinge is definitely one of the most effective ways to make a toy box safe for kids. Because this type is very well designed to avoid those horrifying lid slams. Installing it to the lid is rather simple but only when you are used to fixing such things.
You need to start by checking the placement measurement that should be mentioned in the given manual. And then mark the spots where you’ll mount the hinges. It should make the opening and closing of the lid free from any obstacle, you can test the motion before actually mounting it.
Once you think it's right, mount the hinges. The screws are usually provided. Also, some good soft-close support hinges options even provide compatible screwdriver. It should take you 3-5 minutes basically to finish a soft close toy box lid hinge installation.
Before installing, make sure the hinge is capable to hold the load and provide enough support. There are options made out of steel-nickel combination that provides the ideal robustness, so maybe try looking for something similar.
And also, you should consider the lid’s weight as well as clearance. Usually, toy box lids weight between 40 to 50 pounds. Make sure the hinge can provide that heavy-duty load-bearing capability.
Also keep in mind, that such a heavy-duty hinge may not be able to work for lightweight lids. Usually, because the closing action of a lightweight lid does not match the concept of such hinges that are made for heavy lids.
Wrapping Up
It’s not hard to figure out how to install lid support hinge once you know which one to get for your specific toy box lid. There are many factors apart from just allowing the opening and closing action of a lid.
And one of the main factors has to be safety. A fabulous combination of hinges (like the piano and pneumatic hinge combo we talked about) or perhaps going for a more specifically designed soft close support hinge, no matter which one you chose to go for just make sure it brings value and safety to the toy box.


