Many people may think that they need to own land with existing good-quality soil to start gardening. Sure, having these things beforehand will be an advantage to your gardening process, but it is absolutely not a requirement.
For people who wish to grow plants but struggle to find fine-soiled ground, you need to know about the Raised Garden Bed, also known as the Garden Box. This method is widely used in the United States these days because of the enormous benefits it brings. Therefore, we are going to show you how to build a raised garden bed, which is surprisingly simple to do.
What is a raised garden bed?
If you have ever seen a garden with a lot of boxes in which the owner grows plants inside, those boxes are probably raised garden beds. They usually have a triangle or square shape, which explains why people refer them to the boxes. They are not a type of planters or containers as they have no bottoms. They are four-sided frames, often made of wood, that can keep piles of soil stay put above the ground.
Why should we use raised garden beds?
- Aesthetics: Raised garden beds keep your garden well organized. You can put your boxes everywhere you want, and you can decorate the exterior side of them to make your garden look more lively.
- A barrier to pests: The tall frames of the bed work as protection to prevent pests such as snails or slugs from eating the roots.
- Better condition for your plants: With raised garden beds, you can choose the type of soil that works best for your plant, which will result in a higher yield. Especially if your land contains hard, sandy, or hard soil, raised garden beds are a way to go.
- Extended growing season: Soil tends to be warmer and stays longer when it is above the ground.
- Fewer weeds: They do not have a lot of spaces to grow inside a raised garden bed.
- Accessibility: Raised garden beds make it easier for you to garden. You can choose whatever size for your garden bed that fits your height the most, so you will not hurt your back when taking care of your crops. Because of this reason, people with disabilities can also enjoy gardening.


How to build a raised garden bed by yourself?
As a preparation before building, you have to decide whether you want to make your garden bed from a Kit or from Scratch.
1. From a kit
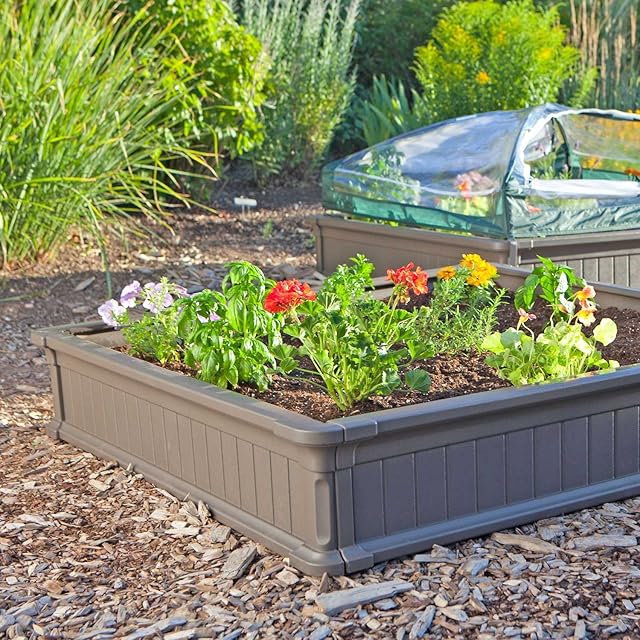
If you choose to build your raised garden bed from a kit, you can purchase it on Amazon. We have already researched and picked for you the most recommended kit, so you do not worry about which one to choose since there are a lot of options.
This kit comes with everything you need to build a bed with thorough instruction. The box is constructed of UV-Protected High-Density Polyethylene (HDPE) with low maintenance weather-resistant design. And its dimensions are 44.5 inches L x 44.5 inches W x 9.0 inches H. It is also said to be stackable.
- This kit can save you time. They come with everything you need to build a bed. And it only takes you about 15 minutes to put everything together!
- The price is reasonable for a high-quality product.
- Since it is stackable, you can change the size according to your preference.
- You do not have the option to choose the material you want for your garden bed.
- According to some reviewers, the material they use to make the bed is not strong enough to hold the soil inside.
2. From scratch
We will guide you through each step of the process. But keep in mind that this option involves a harder procedure compared to the first one. Let’s talk about the pros and cons of building raised garden beds from scratch.
- You have the opportunity to choose the size and the material you want for your bed.
- Your raised garden beds may be more durable and the plants grow better because of your selection for material and soil.
- It can be really expensive if you decide to purchase materials with the highest quality available.
- It will take you a long time and a lot of effort to set up the frames.
2.1. Choose a size for your raised bed
- Width: The recommended width is no longer than 4 feet because this will be easier for gardeners to reach the center of the bed from both sides. Also, as the bed is narrow, you can avoid compressing the soil by not having to step on it when gardening
- Length: Until the width, there is no restrict to the size of the length. If you have enough space, longer beds will be better.
- Height: Depends on what plant you want to grow. We highly suggest that you search for the root depth of your choice of plant beforehand. The root depths can range from 6 to 36 inches.
2.2. Choose your material
This may be the toughest step because there are tons of selections for you to choose from. We will list some of the best options along with their advantages and disadvantage.
- Wood: There are also many different types of wood, but make sure that you purchase untreated ones. Some examples are Redwood, Cedar, and Douglas Fir. Wood is very cost effective and easy to build, however, they can only last up to 10 years.
- Rock: Cheap price (can even be free), but too heavy to lift.
- Steel: The easiest material to set up but can be expensive.
- Concrete masonry: Affordable, easy to find and it can last for the longest time out of all the often. It can hold heat, which negatively affects your garden during hot weather.
2.3. Set up your raised garden bed
Step 1: Measure and cut your raw material into four walls for the garden bed by your choice of dimensions. If your raw material is not big enough to obtain full-dimension walls, you can cut it into smaller boards and clamp them together by using the corner posts on their top. Then you can drill pilot holes and attach the posts with screws.

Step 2: Find a flat spot that has maximum sun exposure to put your garden beds on. Try orienting the long side facing south to ensure that the plants in the bed get equal amounts of sunlight. Take all the walls and lay them down on the ground with their inner corners touching.
Step 3: After setting the frame, you will remove the grass inside it. If your land already has soil, you can use a spading fork to loosen it to help your new plants' roots grow deeply into the ground.

Step 4: Make your garden box by connecting all the walls. Make sure that the posts are on the inside of the bed. Then drill pilot holes and attach them with screws.

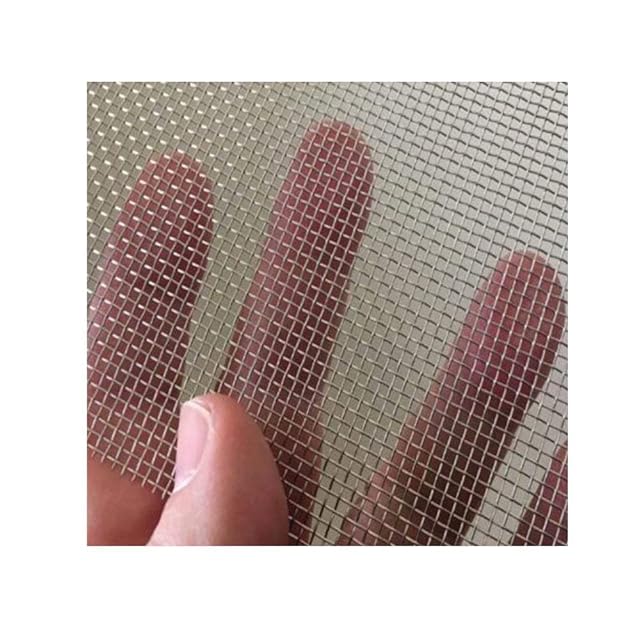
Step 5: (Optional) If you wish to prevent weeds from growing in your garden bed, you can attach wide-mesh hardware cloth to the bottom of the frame. You can also use landscape fabric or newspaper for the same purpose. However, the hardware cloth may be better for you since they will not block earthworms to get in and enrich the soil.
2.4. Choose types of soil
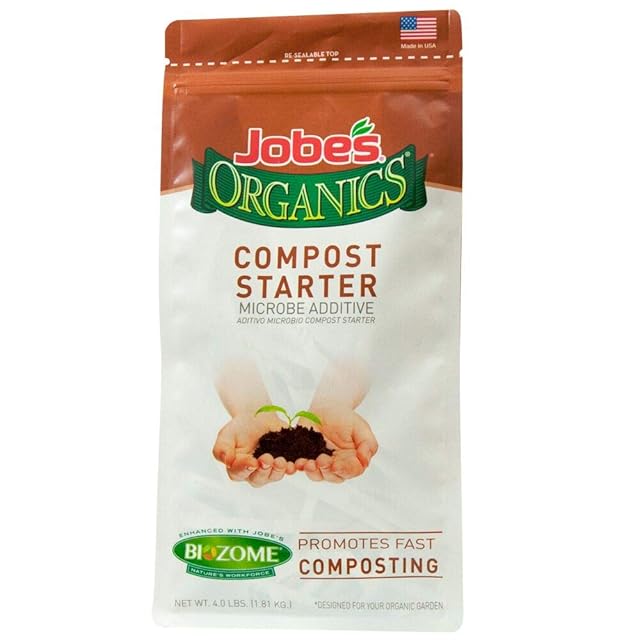
The key to growing plants successfully in a raised bed is compost. Unlike normal gardening type, you cannot just use only topsoil. You need to blend it with compost, the key to grow plants successfully in a raised bed. Their ratio in the mixture will be 1:1. For an even better soil option, you can mix 1/3 of compost with 1/3 of peat moss and 1/3 of vermiculite.
Compost is generally easy to buy. You can order a bag on Amazon and let it ship right to your house. Here is the most recommended compost on Amazon.
Conclusion
On the whole, we can say that it is worth investing in making your own raised garden beds. They do not only perform a better job in protecting your plants but also work as a means to decorate your garden. As long as your garden has enough place, you can always make more garden boxes to grow another type of plant. If you build many beds at once, make sure that you leave a pathway in between. Given the tremendous benefits that garden beds bring, we highly recommend everyone trying to build one yourself. And because it is actually pretty tough to create it without others' help, why don't you can do it with your family or your friends and make unforgettable memories?


