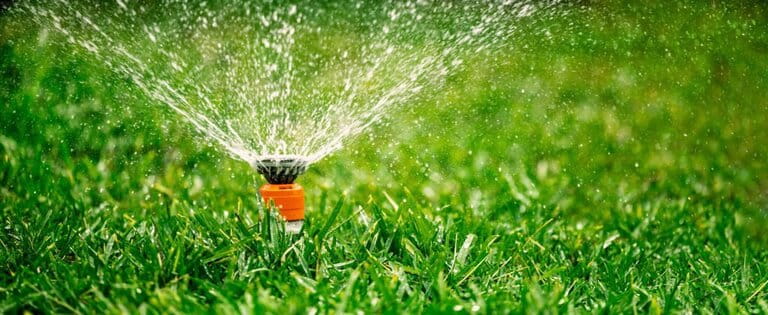
A lush, vibrant lawn is the hallmark of a well-maintained and inviting home. Achieving that picturesque landscape involves more than just regular mowing and weeding—it requires a proper watering regimen. Enter the sprinkler system, a technological marvel that takes the guesswork out of lawn irrigation. Setting up a sprinkler system might seem like a daunting task, but fear not! With our comprehensive guide, you'll navigate the process with ease and set the stage for a thriving, green oasis right in your backyard.
Establishing an Efficient and Customized Sprinkler System
Uneven Watering: Manual watering often leads to inconsistencies, resulting in parched patches and oversaturated areas. A reliable sprinkler system solves this problem by ensuring even water distribution.
Water Waste: Without a well-designed system, water waste can become a concern. Overwatering or poorly timed watering can lead to unnecessary expenses and environmental impact.
Complex Installation: The complexity of setting up a sprinkler system can be intimidating. Lack of knowledge about components, layout, and programming might discourage homeowners from pursuing this efficient watering solution.

Step-by-Step Guide to Setting Up a Sprinkler System
Now, let's dive into the detailed and thorough process of setting up a sprinkler system that guarantees optimal hydration for your lawn:
Step 1: Evaluate Your Lawn
Before embarking on your sprinkler system journey, survey your lawn's unique characteristics. Consider factors such as size, shape, soil type, sun exposure, and existing vegetation. This evaluation will inform your decisions throughout the setup process.

Step 2: Choose the Right Sprinkler Type
Selecting the appropriate sprinkler heads is crucial. Different areas of your lawn might require different types of sprinklers. For example, pop-up spray heads work well in smaller spaces, while rotor heads cover larger areas more efficiently.
Step 3: Calculate Water Pressure and Flow
Measure the water pressure and flow rate of your water source. This essential information will help you choose the correct sprinkler heads and design an efficient system that delivers the right amount of water to each zone.

Step 4: Design the Layout
Create a layout plan on graph paper or using specialized design software. Mark the locations where you intend to install sprinkler heads, ensuring even coverage across your lawn. Avoid overlapping patterns that can lead to water wastage.
Step 5: Determine Zone Requirements
Divide your lawn into zones based on factors such as plant type, sun exposure, and water requirements. Each zone can have its own unique watering schedule and duration, tailored to the specific needs of the vegetation.
Step 6: Choose a Controller
Select a sprinkler system controller or timer that suits your preferences. Modern controllers offer programmable schedules and even smart technology that adjusts watering based on weather conditions and soil moisture.

Step 7: Install Sprinkler Heads
Follow the manufacturer's instructions to install the sprinkler heads in the designated areas. Make sure they are level with the ground and positioned correctly to provide uniform coverage. Adjust the spray patterns as needed.
Step 8: Lay Pipes and Connectors
Using PVC pipes and connectors, lay out the irrigation lines according to your design. Be mindful of the depth at which you bury the pipes to avoid interference with other underground utilities.
Step 9: Test the System
Before burying the pipes, conduct a thorough test of the system. Turn on each zone to ensure that the sprinkler heads are functioning correctly and providing the desired coverage. Make any necessary adjustments.
Step 10: Bury Pipes and Perform Final Checks
Once you're satisfied with the performance of the system, bury the pipes and connectors. Fill any trenches and ensure that the system is well-secured and protected from potential damage.

Step 11: Program the Controller
Set up the controller based on your lawn's watering needs. Program the zones, watering days, start times, and duration. Take into account factors such as soil type, sun exposure, and plant water requirements.
Step 12: Monitor and Maintain
Regularly inspect and maintain your sprinkler system to ensure optimal performance. Check for leaks, clogs, or misaligned sprinkler heads. Adjust the watering schedule as seasons change to prevent overwatering or underwatering.
Conclusion
Setting up a sprinkler system is a gratifying endeavor that yields a lush, healthy lawn while promoting water efficiency. By following this comprehensive guide, you're well-equipped to design and install a customized irrigation solution that caters to your lawn's unique characteristics. From evaluating your lawn and choosing the right components to testing the system and programming the controller, each step contributes to a successful sprinkler system setup.
A well-designed sprinkler system goes beyond convenience—it is an investment in the beauty and vitality of your outdoor space. With proper installation, thoughtful planning, and routine maintenance, your sprinkler system will ensure that your lawn remains a captivating and inviting area for relaxation and play. Embrace the process of setting up a sprinkler system, and revel in the joy of cultivating a garden that reflects your care and attention. As you watch your lawn thrive and flourish, you'll appreciate the transformative impact of a well-established sprinkler system on your home's landscape.


