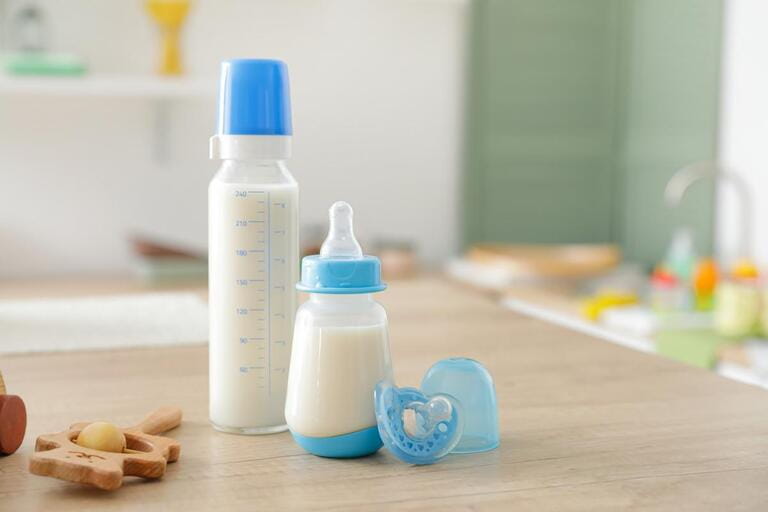
When it comes to caring for your baby, ensuring proper cleanliness and hygiene is crucial, especially when it comes to their feeding equipment. Baby bottles, in particular, require thorough cleaning after each use to prevent the growth of harmful bacteria and keep your little one safe and healthy. In this comprehensive step-by-step guide, we will walk you through the process of cleaning baby bottles after each use, covering everything from disassembly to sterilization. Let's dive in and learn how to maintain the utmost cleanliness for your baby's feeding equipment!
How To Clean Baby Bottles After Each Use
Step 1: Gather the Necessary Supplies
Before you begin the cleaning process, gather all the supplies you'll need. Here's a list of commonly used items:
- Baby bottle brush with a small brush head and soft bristles
- Mild dish soap or baby bottle cleanser
- Bottle sterilizer (optional)
- Clean, hot water
- Bottle drying rack or clean towel
- Bottle nipples, caps, and rings (if applicable)
Having these supplies ready will ensure a smooth and efficient cleaning process.

Step 2: Disassemble the Bottle
Start by disassembling the baby bottle. Carefully remove the bottle nipple, collar, and any other detachable parts. This step allows for a thorough cleaning of each component and ensures that all surfaces are properly cleaned.
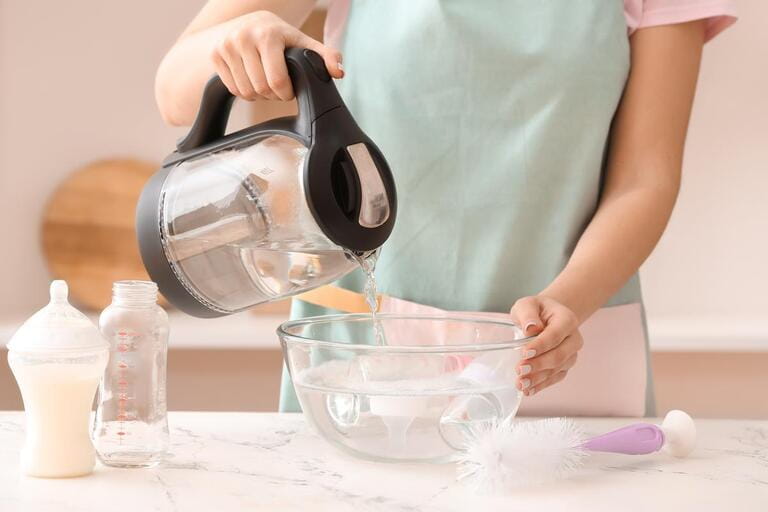
Step 3: Rinse with Hot Water
Before washing the bottle, rinse it under hot running water. The hot water helps remove any leftover milk or formula residue. Make sure to rinse all parts of the bottle, including the interior and exterior, to remove any visible debris.
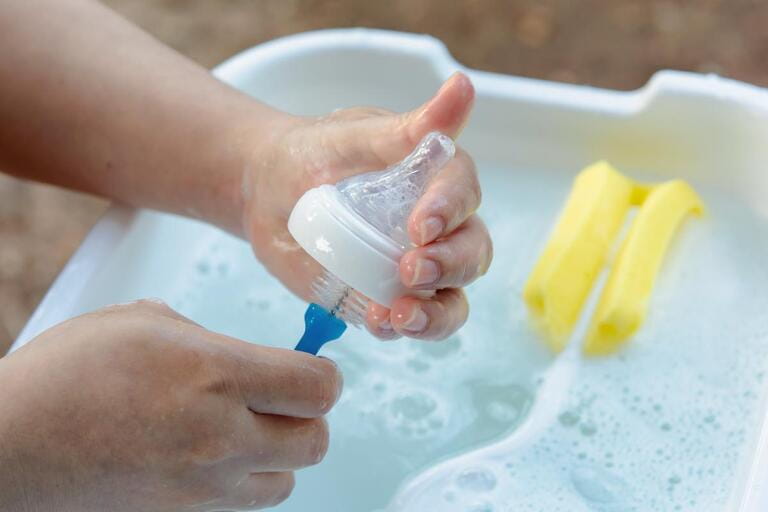
Step 4: Wash with Mild Soap or Baby Bottle Cleanser
Next, wash the bottle and its components with mild dish soap or a specialized baby bottle cleanser. Squirt a small amount of soap onto the baby bottle brush and gently scrub the interior and exterior of the bottle, paying extra attention to the bottom and sides. Ensure that you clean all surfaces thoroughly, including the nipple and collar.

Step 5: Clean the Nipple
To clean the nipple, use the small brush head of the baby bottle brush or a dedicated nipple brush. Apply a small amount of dish soap or baby bottle cleanser to the brush and gently scrub the nipple, both inside and out. Pay close attention to any milk residue that may have collected in the nipple holes.
Step 6: Rinse Again
After washing, thoroughly rinse all the bottle components under hot running water. This step is crucial to remove any soap residue that could be harmful to your baby if ingested. Ensure that you rinse each part separately, checking for any lingering residue.
Step 7: Sterilization (Optional but Recommended)
While not necessary after every use, sterilization plays a vital role in killing additional bacteria and ensuring optimal cleanliness, especially for newborns or babies with weaker immune systems. There are different methods you can choose from:
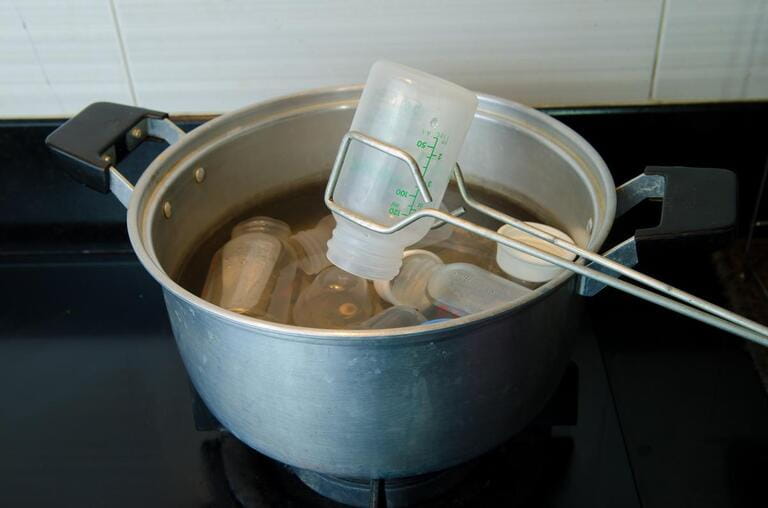
Boiling Method
- Fill a large pot with enough water to fully submerge all the disassembled bottle components.
- Place the components in the pot and bring the water to a rolling boil.
- Boil the components for at least 5 minutes to ensure proper sterilization.
- Use tongs to remove the sterilized components from the pot and place them on a clean towel or drying rack to air dry.
Steam Sterilization
- Follow the manufacturer's instructions for your electric or microwave steam sterilizer.
- Disassemble the bottle components and place them in the sterilizer, ensuring they are properly arranged.
- Run the sterilization cycle according to the manufacturer's guidelines.
- Once the cycle is complete, allow the components to cool before handling. Place them on a clean towel or drying rack to air dry.
Chemical Sterilization
- Purchase a specialized baby bottle sterilizing solution or tablets.
- Follow the manufacturer's instructions for preparing the sterilizing solution.
- Submerge the disassembled bottle components in the sterilizing solution and ensure they are fully covered.
- Let the components soak for the recommended amount of time, typically around 15 minutes.
- Remove the components from the solution and rinse them thoroughly with clean water.
- Place the rinsed components on a clean towel or drying rack to air dry.
Note: Always follow the manufacturer's instructions when using any sterilization method to ensure the safety and effectiveness of the process.
Step 8: Air-Dry or Use a Bottle Drying Rack
After cleaning and sterilization (if applicable), allow the bottle components to air-dry naturally. Place them on a clean towel or a bottle drying rack, ensuring proper airflow to aid in drying. Avoid using a cloth towel to dry the bottles, as it can introduce lint and potentially compromise the cleanliness.

Step 9: Reassemble and Store
Once the bottles and components are fully dry, reassemble them by attaching the cleaned nipple, collar, and any other detachable parts. Make sure all parts fit securely. Store the assembled bottles in a clean, dry place, preferably covered or in a sealed container, to protect them from dust and contaminants until the next feeding.
Additional Tips for Cleaning Baby Bottles
- Clean bottles as soon as possible after each feeding to prevent the milk or formula from drying and becoming harder to remove.
- Check bottle nipples regularly for signs of wear and tear, such as cracks or discoloration. Replace them if they show signs of damage or if the flowis no longer appropriate for your baby's age.
- Wash your hands thoroughly with soap and water before handling baby bottles to prevent any transfer of bacteria or germs.
- Avoid using abrasive sponges or brushes that could damage the bottle or nipple.
- Inspect the bottles and nipples regularly for any signs of mold or mildew. If you notice any, discard the affected components immediately.
- If you're on the go and unable to clean the bottles immediately, rinse them with hot water and store them in a sealed bag until you can properly wash and sterilize them.
- Consider having multiple sets of bottles and nipples to ensure you always have a clean set available while others are being washed and sterilized.
Conclusion
Properly cleaning baby bottles after each use is vital for maintaining your baby's health and safety. By following this comprehensive step-by-step guide, you can ensure that every bottle is thoroughly cleaned, sterilized (if desired), and ready for your baby's next feeding. Remember to keep all bottle components dry and store them in a clean, safe place until needed.
Maintaining a clean and hygienic feeding routine will give you peace of mind and provide your baby with a healthy and enjoyable feeding experience. By prioritizing cleanliness and following these guidelines, you are ensuring that your little one receives the care they deserve.


